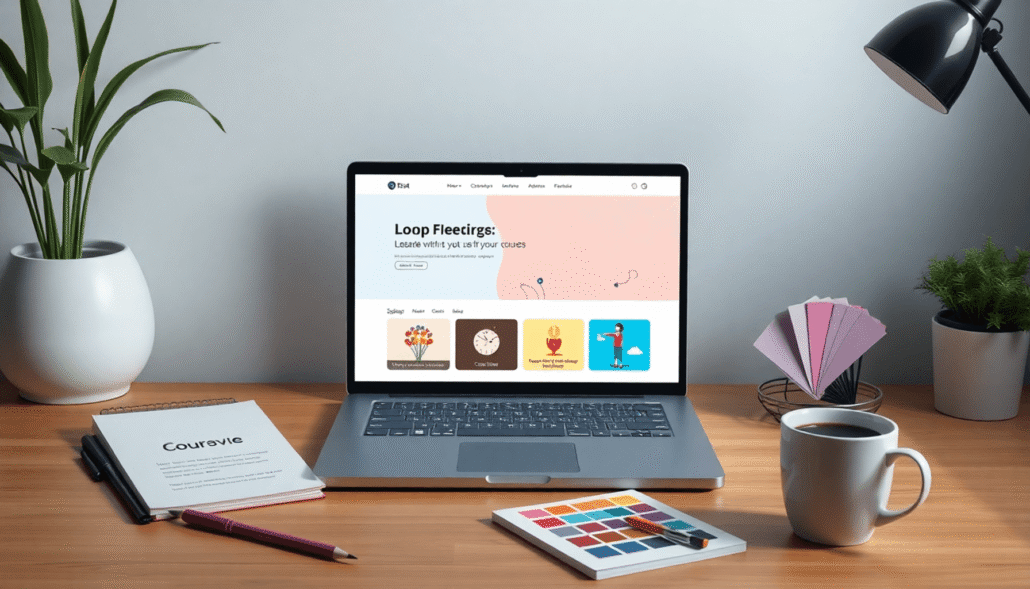
Creating a professional and eye-catching course website no longer requires hiring a costly designer. You can design a branded course site without a designer by leveraging modern no-code platforms and DIY website design tools. These solutions empower creators to build fully customized, visually appealing online course websites with minimal technical skills.
The rise of accessible no-code platforms has transformed how educators and entrepreneurs launch their branded course sites. Tools like WordPress and Showit offer drag-and-drop interfaces, customizable templates, and integrations tailored specifically for online courses. This means you can focus on your content and brand identity without getting bogged down by complicated coding or expensive design fees.
A branded course site plays a critical role in attracting students and keeping them engaged throughout their learning journey. A polished, cohesive look builds trust, reflects your expertise, and sets your courses apart from the competition. Investing time in designing your own site ensures it truly represents your unique style and mission. This includes knowing how to design a homepage for your course website, which is crucial as it acts as the primary touchpoint where potential students decide whether your course meets their needs or not.
It’s essential to understand that a well-crafted course page plays a critical role in attracting and converting learners for your online courses. This article walks you through practical steps and recommended tools to build your course website efficiently, including insights on how to create high-converting course landing pages that explain value clearly. Whether you’re just starting out or looking to refresh an existing site, you’ll discover how to create a seamless, branded experience that resonates with learners—all without needing a professional designer.
If you’re interested in starting this journey, you might want to check out Maatos, where they offer valuable services to help you along the way. For those who already have a course website but are seeking to enhance it, exploring their services could provide some useful insights.
Moreover, if you’re considering different pricing models for your courses, Maatos also provides comprehensive information on course pricing models that convert. It’s also important to note that selling online courses in the European Union comes with its own set of challenges due to the value added tax (VAT), which can complicate the process. Should you have any questions or require further assistance during this process, don’t hesitate to reach out through their contact page.
In addition to these resources, incorporating AI tools like ChatGPT into your course creation process can greatly enhance efficiency and creativity. For example, using specific ChatGPT prompts designed for building courses can streamline content generation and organization significantly. Furthermore, exploring AI workflows for course creators can provide insights on how to effectively integrate AI tools into your lesson planning and content generation processes while avoiding the common pitfall of generating generic content.
Additionally, once your course is up and running, consider implementing some effective strategies for [course upsells without
Why Design a Branded Course Site Without a Designer?
Creating your own course site offers multiple advantages that make it an attractive choice for many creators. The benefits of DIY design extend beyond just aesthetics and touch on practical business needs.
Cost Savings with DIY Website Building
Hiring a professional designer often means significant upfront costs. Design fees can range from hundreds to thousands of dollars, depending on project complexity. When you take the reins yourself, you:
- Avoid these expensive fees entirely
- Gain the flexibility to allocate funds toward marketing or course content creation instead
- Save money on ongoing updates since you control the site directly
This approach to cost-effective website building empowers you to launch and grow without breaking the bank. However, if you prefer a hands-off approach, there are done-for-you services available that can help streamline the process while still being cost-effective.
Full Creative Control and Brand Consistency
Working without a designer places your brand identity firmly in your hands. You decide how every element reflects your vision—from logo placement and color schemes to typography and imagery. Maintaining brand consistency becomes easier when:
- You set brand guidelines that flow through all pages
- You instantly apply changes across your site without waiting for external input
- Your messaging stays clear and authentic because it’s managed by you
Branding is crucial for attracting and retaining students; being hands-on streamlines this process.
Faster Turnaround Times
Outsourcing design work introduces delays. Waiting weeks or even months for revisions slows down your course launch schedule. When you build your own site:
- Updates happen in real time as ideas evolve
- You can respond quickly to student feedback or market trends
- No back-and-forth communication slows progress
Speed matters when establishing an online presence in competitive e-learning markets.
Adaptability and Easy Updates as Content Evolves
Courses are rarely static—they grow with new materials, bonus lessons, or changing formats. A DIY site lets you:
- Add or remove modules effortlessly without technical barriers
- Experiment with layout tweaks to improve student experience
- Keep content fresh and aligned with your teaching style
This adaptability keeps your course relevant over time, supporting long-term student engagement.
Taking charge of your course site’s design blends creative freedom with practical benefits like cost savings, swift updates, and consistent branding—making it a smart strategy for creators eager to build professional, personalized learning spaces.
Understanding which platform best supports this hands-on approach will help you maximize these advantages effectively. For instance, platforms like Maatos offer flexible pricing options that can cater to various budgetary needs while providing robust support for DIY website building.
Choosing the Right Platform for Your Branded Course Site
Selecting the ideal platform is a critical step in designing a branded course site without a designer. Two standout options in the no-code website builders space are WordPress and Showit. Both offer unique strengths tailored to different types of creators and course needs.
WordPress for Courses: A Career-Proof Choice
WordPress remains a powerhouse for course creators who want deep customization, scalability, and robust e-commerce capabilities. It suits those ready to invest time into learning or leveraging existing WordPress knowledge.
Key features include:
- Customization: Thousands of themes and plugins allow you to tailor every aspect of your site — from layout to functionality.
- Scalability: WordPress grows with your business, handling everything from a few courses to a full online academy.
- E-commerce Integration: Tools like WooCommerce enable seamless payment processing, subscriptions, and product bundling.
- Community & Support: A vast ecosystem of developers, designers, and educators provide ongoing support and resources.
- Course Plugins: Specialized plugins such as LearnDash or LifterLMS transform WordPress into a full-featured learning management system (LMS).
This platform suits creators who want control over their site’s technical foundation and expect to expand or customize their offerings extensively.
Showit Platform: Drag-and-Drop Simplicity for Creatives
Showit appeals primarily to creatives looking for quick, visually stunning personalization without coding. Its drag-and-drop interface is intuitive enough that beginners can build professional sites rapidly.
Benefits include:
- Visual Design Freedom: Design every page element exactly how you envision it without restrictions.
- Professionally Designed Templates: Start with beautiful templates optimized for branding that can be customized easily.
- No Coding Required: Everything is handled through a visual editor—ideal if design skills are limited.
- Integration Friendly: Connect with course platforms like Teachable or Thinkific via embedded links or custom buttons.
- Fast Setup: Launch faster because you’re not navigating complex backend setups.
Showit suits those who prioritize aesthetics and ease-of-use over extensive functionality out of the box.
Platform Comparison: What to Weigh Before You Decide
When choosing between WordPress, Showit, or other no-code website builders, consider these factors carefully:
- Ease of Use: How comfortable are you with learning new tools? Showit favors simplicity; WordPress offers power but with a steeper learning curve.
- Customization Options: Do you need pixel-perfect design control or dozens of plugin integrations? WordPress excels in flexibility; Showit shines in drag-and-drop design freedom.
- Template Availability: Both platforms offer templates but cater to different needs — Showit’s templates tend toward creative businesses, while WordPress has specialized themes for education and coaching.
- Integrations with Course Tools: Check compatibility with LMS plugins, payment gateways, email marketing software, and analytics tools essential for managing courses smoothly.
- Long-Term Growth Potential: Consider whether the platform can scale as your course offerings expand or diversify over time.
Ultimately, choosing the right platform sets the foundation for building a branded course site that matches your vision and operational needs without requiring designer intervention. Whether you opt for the robust functionality of WordPress or the aesthetic simplicity of Showit, the next steps involve leveraging these platforms effectively to create functional, engaging online learning experiences.
Leveraging WordPress for Your Branded Course Website
Design a branded course site without a designer by using the flexibility of WordPress. WordPress offers an adaptable environment where you can build a professional, scalable online course platform tailored to your unique brand and teaching style.
Step-by-Step Overview of Setting Up WordPress for Online Courses
- Choose a Reliable Hosting Provider: Select hosting optimized for WordPress to ensure speed and uptime. Managed WordPress hosts like SiteGround or WP Engine simplify updates and security.
- Install WordPress: Most hosts offer one-click installations. After setup, log into your dashboard to begin customizing.
- Select a Customizable Theme: Pick themes designed specifically for education, coaching, or online courses. Themes like Astra, TutorLMS, or Eduma provide layouts and features suited to course delivery.
- Install Essential Plugins: Add functionality required for multimedia lessons, student management, and payments.
- Configure Course Pages: Use page builders such as Elementor or Beaver Builder to design lesson modules, sales pages, and landing pages that align with your branding.
- Set Up User Registration & Management: Enable student sign-ups with membership plugins or LMS systems.
- Integrate Payment Gateways: Connect WooCommerce or Easy Digital Downloads for seamless payment processing.
Importance of Choosing Customizable Themes
Themes crafted for education or coaching businesses come pre-built with layouts optimized for presenting courses clearly while supporting branding elements like logos, color schemes, and typography choices. Customizable themes allow you to:
- Adjust headers, footers, and menus without coding
- Incorporate testimonials and instructor bios
- Embed multimedia content elegantly
- Maintain consistency across course pages
Picking a theme with solid support and frequent updates ensures compatibility with evolving WordPress versions and plugin ecosystems.
Recommended Plugins to Enhance Your Course Site
Plugins extend WordPress’s core capabilities to create immersive learning experiences:
- LearnDash: A comprehensive LMS plugin offering drip-fed lessons, quizzes, certificates, and detailed reporting.
- LifterLMS: Provides robust student management tools including memberships and course bundles.
- WooCommerce: Facilitates product sales including course access subscriptions with multiple payment gateways.
- MemberPress: Enables membership site creation with content restriction controls ideal for premium courses.
- WPForms: Simplifies creating contact forms, surveys, or registration forms integrated within your course site.
Multimedia lesson delivery benefits from plugins supporting video embedding (Vimeo Pro integrations), downloadable PDFs, audio lectures, and interactive quizzes — all manageable without technical complexity.
Implementing these tools during your WordPress setup empowers you to launch a branded course site that feels polished yet remains fully under your control. This approach minimizes reliance on external designers while maximizing customization tailored to your educational goals.
Using Showit to Create a Visually Stunning Branded Course Site
Showit stands out with its intuitive drag-and-drop customization, making it ideal for creators who want control over their course site’s look without writing a single line of code. Its interface is designed to be user-friendly, enabling you to visually build and adjust your pages just like working on a design canvas. You can:
- Move elements freely across the page
- Resize images and text blocks effortlessly
- Layer content to create depth and visual interest
This hands-on approach lets you see immediate changes, reducing guesswork and design back-and-forth often encountered with traditional website builders.
Showit Templates That Elevate Your Brand
A key benefit lies in Showit’s collection of professionally designed templates tailored for online educators, coaches, and creatives. These templates offer:
- Ready-made layouts optimized for engagement and clarity
- Pre-selected fonts and color schemes that adhere to modern design principles
- Responsive designs ensuring your site looks great on mobiles, tablets, and desktops
You can customize every aspect of these templates to align perfectly with your brand identity. For example, swapping out colors or fonts to match your palette or replacing imagery with photos that reflect your course theme happens seamlessly within the platform.
Customization Made Simple
The drag-and-drop system removes technical barriers while empowering you to:
- Adjust page structures without needing to understand CSS or HTML
- Incorporate your logo with precision placement options
- Fine-tune typography settings for readability and style consistency throughout the site
Instead of relying on pre-set grid constraints, Showit gives you creative freedom. This flexibility benefits those who want a unique branded look without hiring a designer or learning complex coding languages.
Branding Consistency Across Pages
Showit helps maintain consistent branding by allowing you to create shared components like:
- Header and footer sections reused across all pages
- Style presets for buttons, headings, and links that automatically apply site-wide
- Global color palettes ensuring every element matches your visual identity
These features save time during setup while preserving professionalism in every visitor interaction.
Using Showit’s drag-and-drop customization alongside its rich library of Showit templates equips you with everything needed to build a visually compelling branded course site—without designer fees or technical roadblocks. This approach suits creators who value both aesthetics and ease-of-use in launching their online courses.
Best Practices for Branding Your Course Site Without a Designer
Creating a strong brand consistency online starts with defining your visual identity. This identity shapes how students perceive your course and helps build trust and recognition. Focus on these core elements:
Logo Placement
Your logo is the cornerstone of your brand. Place it prominently but tastefully on every page, typically in the top left corner of the header. This positioning aligns with user expectations and ensures immediate brand recognition without overwhelming the content.
Color Palette Selection
Choose a limited color palette—usually 3 to 5 colors—that represent your brand personality. Use tools like Adobe Color or Coolors to create harmonious schemes. Assign specific roles to each color:
- Primary color for buttons, headers, and calls to action
- Secondary colors for backgrounds or accents
- Neutral tones for text and white space
Consistency in color usage across landing pages, sales pages, and lesson modules reinforces your brand visually, making navigation intuitive and aesthetically pleasing.
Typography Choices
Select 1 or 2 complementary fonts that reflect your brand tone—whether professional, friendly, or creative. Use one font for headings and another for body text to maintain readability and hierarchy. Avoid using too many font styles which can dilute your visual identity and confuse users.
Incorporating Visual Design Basics
To effectively implement these branding strategies, it’s essential to understand the visual design basics for course websites. These principles can help you build engaging, branded course websites with no coding needed, while also boosting learner interaction with smart visual design tools.
Maintaining Consistent Branding Across All Pages
Consistency goes beyond colors and fonts. Every page should echo the same design language and messaging style:
- Headers and Footers: Keep uniform layouts with matching colors, typography, and logo placement so users feel grounded while moving through your site.
- Button Styles: Standardize button shapes, sizes, hover effects, and colors to create predictable interactive elements.
- Imagery: Use a consistent style of images or illustrations—whether photos are bright and airy or moody and dramatic—to support your brand mood.
- Content Formatting: Align text blocks, bullet points, spacing, and callouts uniformly throughout course lessons as well as marketing pages.
Visual Identity Tips That Support Brand Consistency Online
“A cohesive visual identity isn’t just about looking good; it’s about creating an experience that feels seamless from start to finish.”
- Create a brand style guide document summarizing fonts, color codes (hex/RGB), logo usage rules, imagery guidelines, and tone of voice.
- Use this guide as a reference whenever adding new pages or updating existing content.
- Leverage platform features such as global styles in WordPress themes or Showit’s site-wide settings to apply consistent branding effortlessly.
- Preview your site on multiple devices regularly to ensure visual elements remain consistent across screen sizes.
Applying these practices helps transform a DIY course site into a polished branded experience that keeps students engaged and confident in your professionalism.
Integrating Multimedia and Course Content Seamlessly
Creating a branded course site without a designer means paying close attention to how your multimedia lessons integration enhances the learning experience. Proper organization and accessibility of videos, PDFs, and other content types are essential to keep students engaged and minimize confusion.
Key strategies for multimedia integration include:
- Clear content structure: Break down your course into modules or sections with descriptive titles. Use collapsible menus or tabs to keep the interface clean and allow learners to navigate easily between lessons.
- Consistent formatting for media types: Present videos, PDFs, audio files, and quizzes in predictable formats throughout your site. For example, embed videos directly on lesson pages with a consistent player size. Provide downloadable PDFs with clear labels and preview thumbnails when possible.
- Use of multimedia players and viewers: Choose platforms or plugins that support responsive video players and document viewers. This ensures content adapts well across devices, from desktops to smartphones, improving accessibility for all students.
- Optimizing load times: Compress videos and images without sacrificing quality to reduce page load times. Fast loading pages reduce bounce rates and create a smoother user experience.
- Accessible design considerations: Include captions for videos and provide alternative text descriptions for images and documents. This makes your course site usable for students with disabilities or those using assistive technologies.
- Integration with course management tools: Platforms like WordPress support plugins such as LearnDash or LifterLMS that facilitate seamless multimedia embedding alongside quizzes, assignments, and progress tracking. Showit users can link multimedia hosted on third-party platforms like Vimeo or Google Drive while maintaining brand consistency on their site.
- Preview and testing routines: Before launching each course module, preview how all media appears on different browsers and devices. Testing ensures no broken links, playback errors, or formatting inconsistencies disrupt student learning.
By organizing your multimedia lessons thoughtfully and leveraging the right tools within your chosen platform, you can build a professional, branded course site that feels polished without needing a designer’s help. Effective multimedia integration enriches your content delivery while supporting diverse learner needs clearly and accessibly.
Managing Students and Operations Without Technical Complexity
Handling student enrollment, progress tracking, and communication can feel daunting without a technical background. Fortunately, many no-code platforms and plugins come equipped with student management tools designed to simplify these tasks.
Built-In Student Management Features
Some course platforms include native functionality for managing users:
- User Registration and Profiles: Allow students to create accounts, update profiles, and track their course progress within the site.
- Access Control: Restrict content based on enrollment status or membership levels to ensure only registered students access course materials.
- Progress Tracking: Automated tracking of lesson completion and quiz scores helps both you and your students monitor advancement.
- Communication Tools: Integrated messaging systems or announcement features facilitate direct communication without needing external apps.
Popular Third-Party Tools Compatible with No-Code Platforms
When built-in options are limited or you need more advanced features, third-party plugins or SaaS tools help manage operations smoothly:
- MemberPress (WordPress): A powerful membership plugin that controls user access, handles subscriptions, and manages payments seamlessly.
- LearnDash (WordPress): A comprehensive LMS plugin offering detailed student analytics, drip-feed content capabilities, quizzes, certificates, and more.
- Teachable & Thinkific: While standalone platforms, they can be integrated via links or embeds into WordPress or Showit sites for robust student management without complex setup.
- Maatos: An emerging SaaS platform combining drag-and-drop website creation with integrated multimedia lesson builders and user management designed specifically for creators.
Features to Prioritize in Student Management Tools
Choose tools that offer ease of use alongside essential functionalities:
- Simple User Onboarding: Intuitive registration processes reduce barriers for new students.
- Automated Notifications: Email reminders for upcoming lessons or payment renewals keep students engaged without manual follow-up.
- Payment Integration: Secure payment gateways supporting one-time purchases, subscriptions, or payment plans streamline monetization.
- Data Export & Reporting: Access to student data reports helps evaluate course performance and identify areas for improvement.
Avoiding Technical Overwhelm
You don’t need complex backend setups or coding skills to run a professional course site. Many no-code platforms emphasize plug-and-play integration with popular student management systems. You focus on delivering content while the technology handles administrative overhead efficiently.
Selecting the right combination of built-in features and third-party tools empowers you to maintain control over your course operations. This balance ensures a smooth experience for both you as a creator and your students as learners.
Enhancing Your DIY Course Site with Maatos Platform Features
Maatos stands out as a SaaS platform tailored for creators who want to design and manage branded course websites without relying on designers or developers. It combines ease of use with powerful features that align perfectly with the needs of online educators.
Key Highlights of Maatos Course Builder Features
1. Integrated Multimedia Lesson Builder
Maatos offers a seamless multimedia lesson builder that supports video, audio, PDFs, quizzes, and other interactive content formats. This integration helps you create engaging lessons directly within the platform without juggling multiple tools or plugins.
2. Drag-and-Drop Website Creation Tools
The platform’s intuitive drag-and-drop editor lets you customize layouts, colors, fonts, and branding elements effortlessly. You can build a professional-looking course site that reflects your unique style while maintaining consistent branding across all pages.
3. All-in-One Solution for Educators
Unlike platforms that require stitching together various plugins or external services, Maatos provides an all-in-one environment where course creation, website design, student management, and payment processing coexist smoothly. This reduces the complexity usually involved in managing multiple systems.
4. User-Friendly Interface Built for Non-Technical Users
The clean and straightforward interface ensures creators with no coding experience can build sophisticated course sites quickly. It empowers you to focus on content and branding instead of technical hurdles.
5. Customization Without Compromise
While being beginner-friendly, Maatos does not sacrifice flexibility. You can tweak design details or add custom elements to suit your brand identity perfectly — a balance often hard to find in no-code platforms aimed at educators.
By leveraging Maatos course builder features alongside platforms like WordPress or Showit, you gain access to specialized tools crafted specifically for online teaching success. This synergy enables you to maintain creative control and technical simplicity while delivering a polished learning experience for your students.
Launching Your Branded Course Site Successfully Without a Designer
Launching your course site marks a critical milestone in creating an engaging learning experience. To ensure your site functions seamlessly and reflects your brand professionally, follow a detailed website launch checklist online courses rely on for smooth delivery and user satisfaction.
Test Responsiveness Across Devices
- Use multiple devices like smartphones, tablets, and desktop computers to check how your course site adapts.
- Verify that layouts adjust correctly without content overlapping or disappearing.
- Check font sizes, button placements, and navigation menus on smaller screens.
- Tools such as BrowserStack or Google Chrome’s Developer Tools can simulate various device views for thorough testing.
Verify All Links and Navigation Paths
- Click every link on your site—from homepage buttons to lesson module navigation—to confirm they lead to the correct pages.
- Ensure external links open properly without errors or redirects to unrelated sites.
- Test anchor links within pages for smooth scrolling behavior.
Confirm Multimedia Elements Load and Play Correctly
- Videos should stream without buffering issues; test different internet speeds if possible.
- PDFs and downloadable resources must open without error or broken files.
- Interactive quizzes or embedded tools need full functionality.
Test User Registration, Login, and Payment Processes
- If your course requires account creation, walk through the registration and login steps as a new user.
- Simulate payment transactions using sandbox modes available in plugins like WooCommerce or Stripe integrations.
- Confirm confirmation emails or receipts are sent promptly after purchase or signup.
In addition to these steps, you might want to consider implementing the lean course MVP approach, which can help you build your online course in just 7 days and launch it within 14. This focused strategy emphasizes the core essentials needed to bring your online courses to market rapidly. Moreover, you could also explore strategies on how to pre-sell a course before you build it. This approach not only validates demand but also generates early revenue, enabling a faster launch with Maatos’ all-in-one platform.
Optimize Site Speed and Performance
- Use tools like Google PageSpeed Insights or GTmetrix to analyze loading times.
- Compress images and optimize multimedia files without sacrificing quality.
- Minimize use of heavy scripts or unnecessary plugins that slow down page rendering.
Review Branding Consistency on Live Site
- Double-check logo placement, color schemes, typography choices across all pages for uniformity.
- Make sure customizations made during development reflect accurately post-launch.
Set Up Analytics and Tracking
- Integrate Google Analytics or similar platforms to monitor visitor behavior, engagement rates, and conversions from day one.
- Configure event tracking for key actions such as video plays, quiz completions, and purchases.
Prepare Backup and Security Measures
- Enable automatic backups through hosting provider tools or WordPress plugins like UpdraftPlus.
- Activate SSL certificates to secure data transmissions with HTTPS protocols.
- Use security plugins (e.g., Wordfence) to protect against malware or unauthorized access attempts.
Adopting this website launch checklist online courses creators trust helps you avoid common pitfalls that may disrupt student experience. Testing extensively before going live ensures your branded course site runs smoothly across all devices while maintaining professionalism—critical when you design a branded course site without a designer.
Conclusion
Building your own branded course site without a designer is more achievable than ever thanks to the rise of no-code platforms and rich educational resources. These tools put you in control, allowing you to craft a professional, cohesive online presence that meets the high standards expected in today’s competitive e-learning market.
Key takeaways for a successful DIY branded course site:
- Empowerment through education: Learning platforms and courses help you move beyond basic templates to design with intention and strategy.
- Intuitive no-code tools: Solutions like WordPress and Showit eliminate technical barriers, making customization accessible while preserving brand integrity.
- Quality without compromise: You can maintain polished visuals and seamless functionality without outsourcing expensive design work or sacrificing creative control.
For creators seeking an all-in-one solution that supports every phase—from site creation to managing multimedia lessons and student engagement—Maatos offers integrated features tailored specifically for online educators. Its drag-and-drop interface combined with powerful course management tools simplifies the process even further, helping you launch and grow profitable courses confidently.
Design a Branded Course Site Without a Designer by leveraging these modern tools and strategies. This approach not only saves costs but also strengthens your connection to your brand and audience through hands-on ownership of your course platform.