
Organizing your first webinar sounds like something for big companies with a studio and a production crew. It isn’t. You need a subject you know well, a laptop, and the right (usually free) software — and you’re most of the way there. In this guide we’ll walk through the whole thing together: from setting your goal and choosing a topic, to promoting it, running the day itself, and what to do with the recording afterwards.
Because that’s the quiet magic of a webinar: your audience isn’t limited to the people who can make it at that exact time. Record it, and anyone, anywhere, can watch later — which is precisely why it works so well for marketing. Add enough genuine value and you can pull in a surprising number of new customers and students from a single session.
And don’t worry about the tech. Yes, you too. Let’s get started.
Why organize a webinar in the first place?
You run a webinar because it’s the fastest way to show your expertise and turn viewers into customers. It can feel like you’re giving your knowledge away for free, but in practice the opposite happens: a good webinar drives your sales over the long run.
Think of it this way. Before you commit to a two-hour film, you watch the trailer. You want to know whether you like the actors and whether the mood fits. Someone weighing up your online course feels that same pull. A short intro video is nice, but a full webinar is better: you show you have the expertise people expect, and you let them see a bit of who you are before they buy anything.
That’s how a webinar becomes a real step in your sales funnel. You build trust, answer objections live, and at the end you point the way to your offer. If you want to map that whole path out — from free viewer to paying student — read our evergreen webinar funnel blueprint next.
What do you need for a webinar?
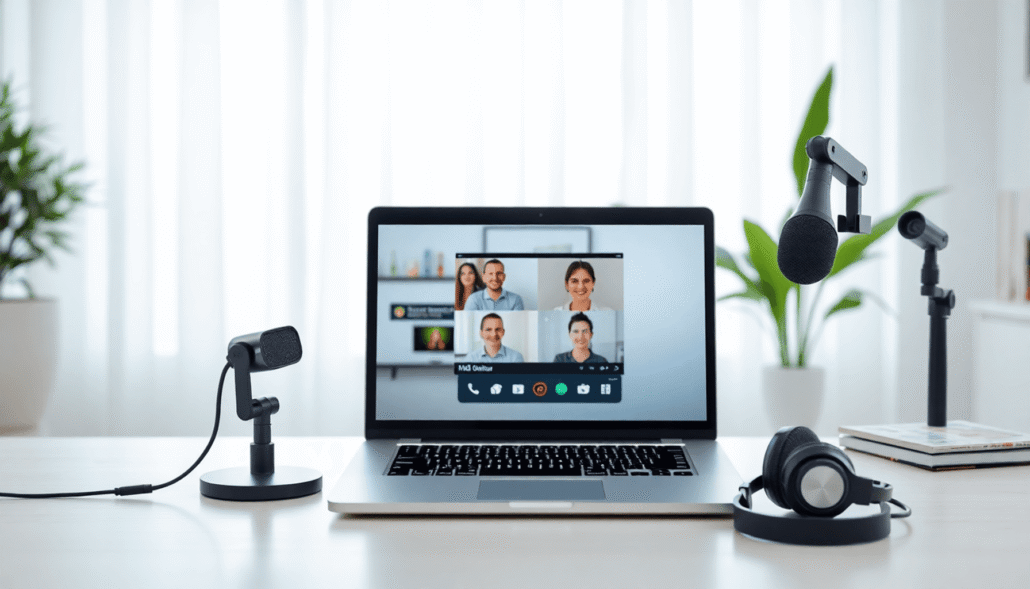
You need surprisingly little to run a webinar: a stable internet connection, good sound, a quiet room, a tidy presentation, and the right software. Often that’s no more than the laptop you already own — sometimes just your phone — plus apps you’re probably already using.
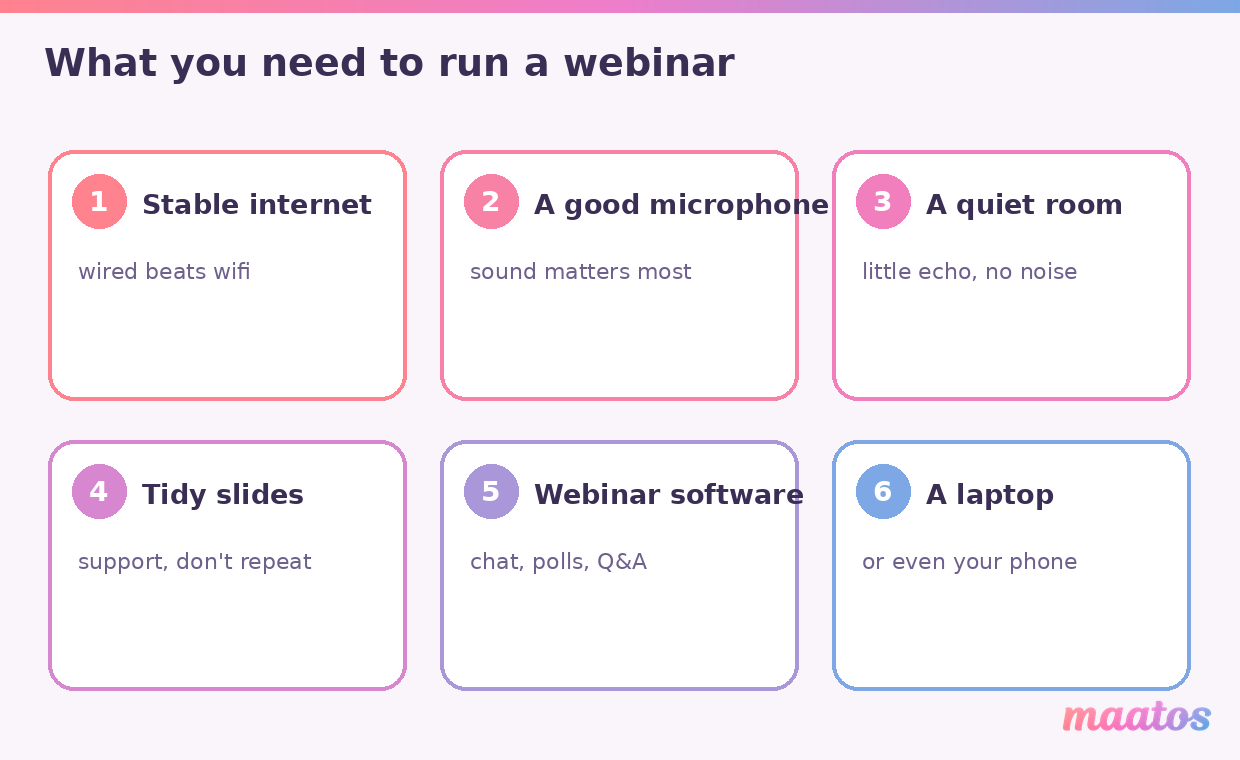
The most important thing is a stable internet connection. Nothing loses a room faster than a presenter who freezes mid-sentence. If you’re on wifi and you can plug in with a cable, plug in. Think about power too: if you’re going properly big and professional, make sure your laptop is fully charged or on the charger.
After that, sound matters more than picture. Viewers will forgive a mediocre camera, but they drop off the moment there’s hiss or echo. Pick a quiet room with little reflection and use a decent microphone. Much of this is the same craft as recording a lesson, so if you want the details on picture, lighting and audio, our guide to making course videos carries over almost one-to-one.
A clean, uncluttered presentation makes your story more credible, and good webinar software lets your viewers react or ask questions without friction. That’s really the whole kit — the rest is preparation.
How to organize a webinar: the six steps
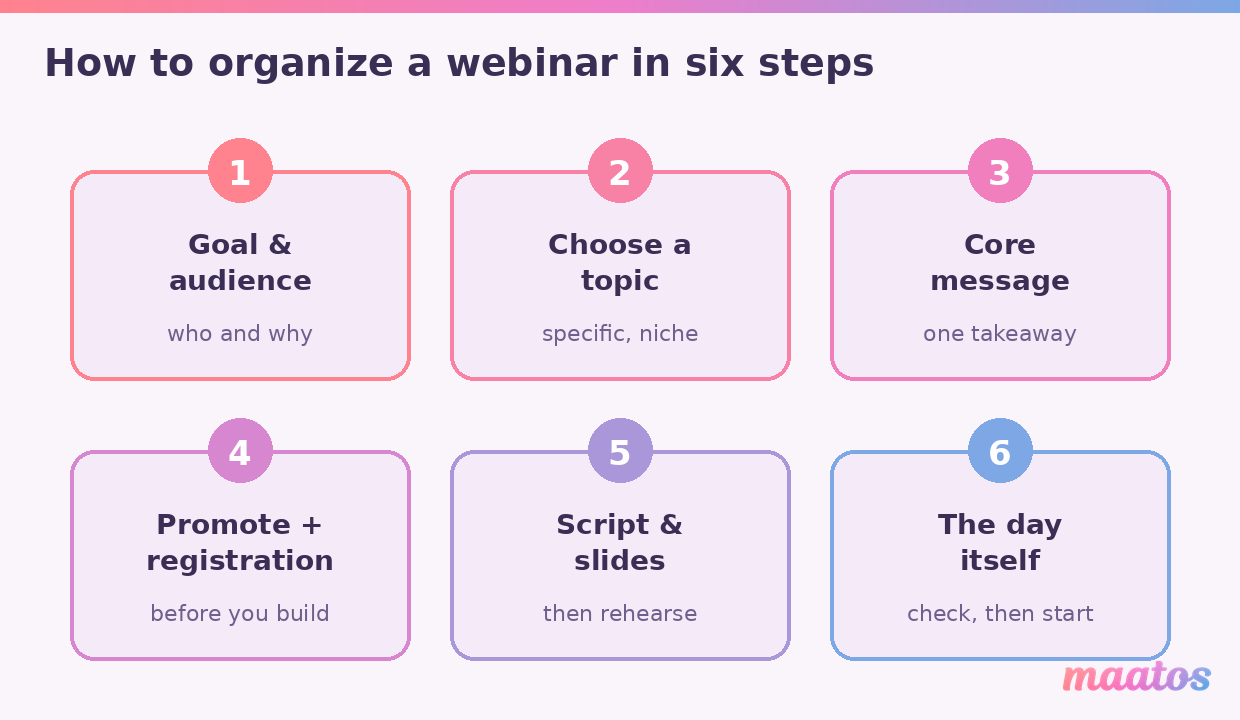
You organize a webinar in six clear steps: set your goal and audience, choose a topic, sharpen your core message, promote it and build a registration page, write your script and slides, and prepare for the day itself. Here’s each one in turn.
Step 1: Set your goal and your audience
Always start with one concrete goal. Do you want to collect leads, sign people up for your course, gather feedback on an idea, or simply grow your authority? That goal shapes everything that follows — your topic, your call to action, even which software you pick. A webinar without a clear goal quickly feels like an aimless chat, and viewers sense it.
Then define exactly who it’s for. The more specific your audience, the easier everything else becomes: people only sign up when they immediately understand what they’ll learn and why it’s relevant to them. “Anyone who wants to learn something” is not an audience; “first-time freelancers setting up their very first online course” is.
Step 2: Choose the right topic
Pick a topic that’s specific and niche. That sounds backwards — surely you want to reach as many people as possible — but when people feel your webinar was made precisely for them, they’re far more likely to register. Focus is your friend here.
Stuck for an angle? Let your audience decide. Run a poll or ask a question in your community to find out what they’re wrestling with. You get a little free promotion out of it, and you know for certain your topic has an audience. It’s also worth building in room for questions, so the session feels less like a monologue and more like a conversation.
And stay specific. Nobody wants to sit through ninety minutes of a generic overview — that’s what a search engine is for. Choose one concrete slice of your field. It’s easier to market and it stops your webinar from sprawling.
Step 3: Decide on your core message
A clear story is everything. Take the time to sharpen it before you start building slides. First decide what your core message is: the one thing participants absolutely must remember, even if they drop off early. Build a logical structure around it — a clear opening, a middle, and a close — and only include information that’s genuinely valuable to your audience. Anything that doesn’t serve that message can go.
Bring your story to life with examples and anecdotes from your own experience. That keeps attention, makes your material easier to grasp, and quietly proves you actually do this for a living. If you’re not sure how to sequence the whole thing, our guide to building a course outline students actually finish uses the same structural thinking you can borrow for a single session.
Step 4: Promote it and build a registration page
Start promoting before you build out the content in detail. If no sign-ups come in, you don’t want to have poured hours into the material first. How you announce your webinar largely determines your attendance, so use several channels: invite your mailing list, post where your audience actually hangs out (LinkedIn, Facebook, Instagram, wherever that is), and add a banner or pop-up on your own site.
The heart of your promotion is your registration page. This is where an interested viewer becomes a registrant. A good sign-up page answers three questions at a glance: what will I learn, who is this for, and why should I register now? Keep the form short — a name and email address is usually enough — and only promise what you can deliver. Most webinar software lets people register in advance and sends automatic reminders, which cuts down on no-shows.
Get creative with the announcement. Tease what viewers can expect, or share a comment from a previous session. A webinar is also a natural lead magnet in its own right; if you want more ideas along those lines, our piece on lead magnets for course creators is a good companion. Start on time, but not so early that people forget you’re running anything — around two weeks ahead is usually the sweet spot.
Step 5: Write your script and slides
A good script keeps you on track so you don’t wander off and you cover every important point. Open with an introduction where you present yourself and any co-hosts, work through your main topics with enough detail without dragging, and close with a strong call to action that ties back to the goal from step one.
Then test your script thoroughly. Do a couple of practice runs to get comfortable with both the content and the tech, and ask a colleague or friend for feedback — fresh eyes spot the weak spots fast. Make slides that support your story rather than repeat it, and test them inside your webinar software straight away, so you know exactly how everything behaves when you go live.
Step 6: Prepare for the day itself
On the day, it’s all about staying calm and checking. Test your equipment and connection well in advance, so a loose cable isn’t a nasty surprise. Know precisely who’s on when if you’re working with several speakers, and keep your engagement tools ready: polls, a Q&A, and space for reactions keep your audience involved. Run through the software one more time, so buttons and screen sharing don’t become a puzzle while people are watching.
Then just begin. Give attendees a few minutes to trickle in after the official start, and then go. Nerves are part of it — after the first minute you’ll have forgotten all about them. A warm welcome, a quick “where’s everyone joining from?”, and a clear promise of what’s coming sets the tone for the whole session.
Which webinar software should you choose?
The best webinar software is the one that fits your goal, your audience size and your budget — not necessarily the most expensive. When you’re choosing, watch a few things in particular: can you share your screen easily, are there interactive options like chat, polls and a Q&A, and can you record the session so anyone who missed the live broadcast can watch it back?
Ease of use carries a lot of weight. Both you and your attendees need to work the tool without fuss; an intuitive interface saves you a mountain of support questions mid-session. And look at integrations — links to your email marketing, your CRM or your socials make following up afterwards far easier. Below we put the best-known options side by side: the free tools first, then the paid ones.
Free webinar software
Chances are you already own a tool you can start with — for nothing at all. These options are ideal the first time you run a webinar.
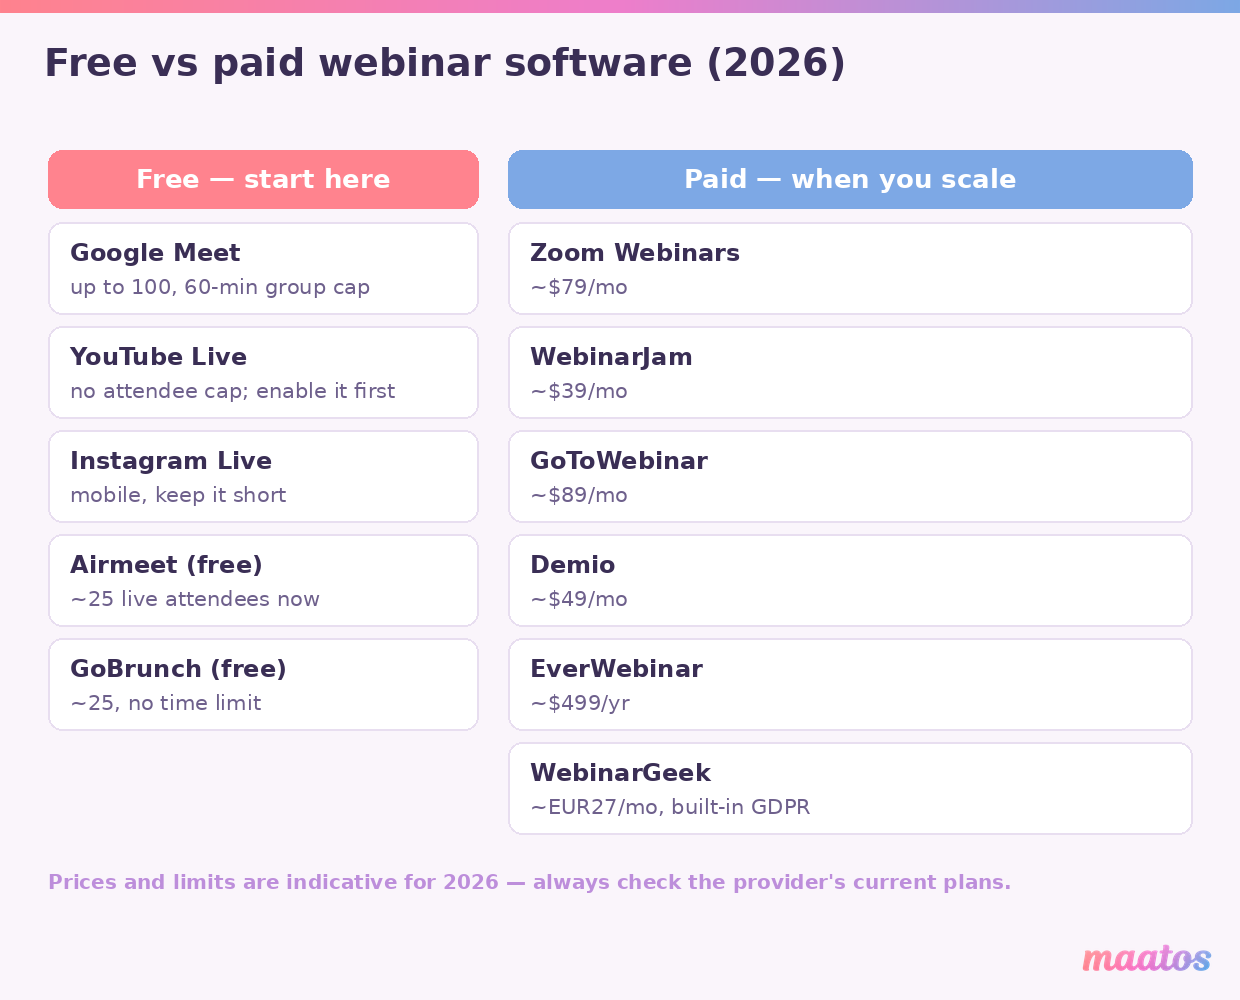
Google Meet. Meet does more than meetings: you invite people with a single link, host up to 100 attendees, and broadcast for up to 60 minutes on a free group call. Perfect for starting fast with what you already have.
YouTube Live. Don’t forget you can go live on YouTube. Low barrier, no attendee cap, and viewers can react in the chat. A solid choice if you want to reach a large, open audience — just enable live streaming on your channel ahead of time, as it can take a little while to switch on.
Instagram Live. If your audience spends a lot of time on Instagram, you can run a webinar-style session there too with a bit of creativity. Keep it short — nobody wants their phone tied up for an hour — and play with whatever comes in through the comments. You can even add someone to your live for more interaction.
Airmeet. If you want a tool genuinely built for webinars and online events, the free version of Airmeet is a starting point. Note that the free tier has tightened to around 25 live attendees, and for bigger or public events you’ll move onto a paid plan fairly quickly. For a small, private test run it’s fine.
GoBrunch. GoBrunch also has a usable free version for webinars. You can host roughly 25 attendees and — nicely — without a time limit. The free plan even includes a range of tools to make your session interactive. (Zoom’s free tier works too, but it caps group calls at 40 minutes, so it’s better as a quick test than a real event.)
Paid webinar software
If you want more attendees, a more polished feel, or automated webinars, a paid tool starts to earn its keep. The prices below are indicative starting points for 2026 — always check the provider’s current plans, because they change regularly.
Zoom Webinars. Zoom is one of the best-known names for online meetings and webinars. Its paid webinar plans (from roughly $79 a month) give you unlimited broadcast time, more attendees, custom registration pages, links to marketing tools and in-depth analytics, along with interactive elements like polls, Q&A and breakout rooms.
WebinarJam. WebinarJam is built specifically to host webinars and leans towards marketing-focused sessions. Depending on your plan (from around $39 a month, billed yearly) you can welcome hundreds to several thousand attendees, with automatic reminder emails, built-in payments and a handy replay feature.
GoToWebinar. GoToWebinar sits in the higher tier (from roughly $89 a month) and is popular with larger, corporate organizations. It offers detailed reporting, interactive elements like polls and surveys, and reliable HD streaming in a friendly interface.
Demio. Demio is known for a clean, easy experience and is a favorite among course creators (from around $49 a month). You manage registrations easily, create automated recordings, and can run both live and on-demand webinars. Its links to marketing and CRM tools are extensive.
EverWebinar. If you want automated webinars that appear to run “live” at set times, EverWebinar (from roughly $499 a year, with a cheap trial period) is a strong choice. You turn recorded sessions into automated broadcasts and personalize the experience per viewer. It’s often used alongside WebinarJam.
WebinarGeek. WebinarGeek is a European tool that excels at ease of use and, handy for anyone selling into the EU, ships with built-in GDPR features (from around €27 a month, with a free trial). You get customizable registration pages, automated emails, and both live and automated webinars, with polls, quizzes and Q&A to keep your audience engaged.
Which paid tool fits best depends on your attendee numbers, your budget and the kind of experience you want to offer. If you mostly want your legal bases covered for a European audience, WebinarGeek is a logical first pick; if it’s all about marketing funnels, WebinarJam and EverWebinar sit closer to your goal.
What does it cost to run a webinar?
Running a webinar can be completely free. With Google Meet, YouTube Live or GoBrunch you can deliver a perfectly good first webinar without spending a cent — especially while your audience is still small. Costs only appear once you want more attendees, need automatic reminders and registration pages, or want to run automated webinars. Then you’re roughly looking at $25 to $90 a month for a dedicated tool.
More important than the tool’s price is the question of whether you need a separate tool at all. If your main aim is to show your expertise and then sell your course, the free webinar is the on-ramp and you make your money back through course sales — not through an expensive webinar suite. Start small, measure what works, and only invest in paid software once your numbers and your offer justify it. When you’re ready to sell, having your own platform means you keep the revenue instead of handing a cut to someone else.
Recording your webinar and privacy: what to watch for
If you record your webinar, you’re processing personal data — at minimum names and email addresses, and with a recording possibly the image and voice of participants. Where privacy law like the EU’s GDPR or the UK GDPR applies (which is the case for most creators with a European audience), you have to inform participants about this clearly and in advance. In practice you handle that with a few simple habits.
- State on your registration page that the session will be recorded and what you’ll use the recording for, with a link to your privacy policy.
- Ask for consent where it’s needed — for example, a tick-box on the sign-up form for receiving follow-up emails.
- Planning to share the recording publicly later? Say so up front, and preferably keep only yourself and your slides on screen, not participants’ cameras.
This isn’t legal advice — if you’re unsure about your specific situation, check with a specialist — but with these basics you’re on solid ground for most webinars. Tools like WebinarGeek build these privacy settings in by default, which makes life a good deal easier. Even outside the EU, being upfront about recording and consent is simply good practice that builds trust.
Extra tips for a webinar that lands
Record it, and give it a second life
Always record your webinar. That way people who missed the live session can watch it back, and — more importantly — you give your content a second life. A recorded webinar can be reused several ways: as a catch-up for anyone who couldn’t join live, as a taster for prospective students who are still on the fence, and even as a fully-fledged self-study module inside your course.
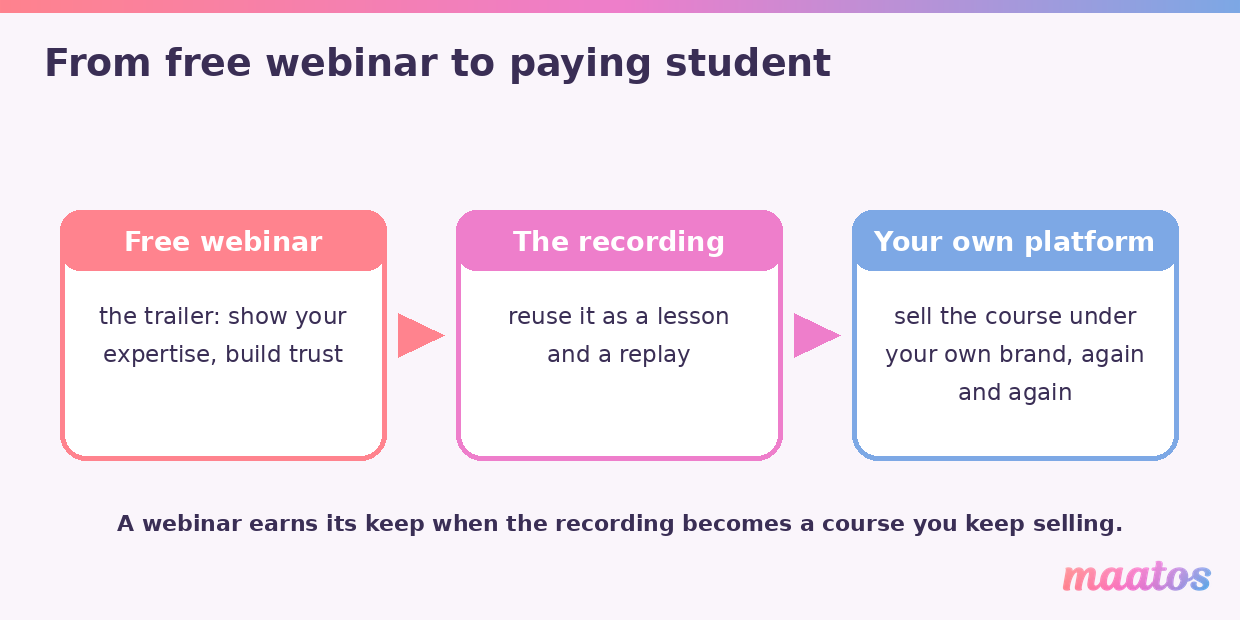
That last option is where it gets interesting. A good webinar is really a finished lesson already. Put that recording on your own course platform and you sell it over and over without doing any more work for it. If you want to sharpen the recording craft itself, our article on making course videos will get you going. And because a webinar is a growth tactic at heart, our Creating Courses hub has plenty more ideas for turning sessions into students.
Follow up properly afterwards
When the webinar wraps, you’ll probably want to snap the laptop shut and exhale. Do — but then open it again, because the follow-up deserves as much attention as the live session itself. Send attendees a thank-you, let them know they can always reach out with questions, and send along the link to the offer or page you mentioned during the webinar one more time.
Use this moment to learn, too: ask for feedback or what they’d like to see in a future webinar. Share the recording, and pass on the link to your community, your socials or your newsletter. If the webinar led towards a paid course, make sure the page it points to is doing its job — our guide to sales page sections that convert and the different course pricing models that convert both help here. This is how the conversation keeps going long after the broadcast has stopped — and that’s exactly where a webinar earns its money back.
Rather have someone set the whole thing up for you? Our done-for-you service can take the technical side off your plate, and you’re always welcome to get in touch with questions.
Frequently asked questions about organizing webinars
How do you organize a webinar yourself?
You organize a webinar in six steps: set your goal and audience, choose a specific topic, sharpen your core message, promote it and build a registration page, write your script and slides, and prepare for the day itself. With a laptop, good sound and free software like Google Meet, you could start today.
Can you organize a webinar for free?
Yes. With Google Meet (up to 100 attendees, 60 minutes), YouTube Live (no cap) or GoBrunch (up to about 25 attendees, no time limit) you can deliver a complete webinar at no cost. Paid tools only become necessary for larger numbers, automated webinars, or more advanced registration and analytics features.
What software do I need for a webinar?
For a simple webinar, a tool you already have — like Google Meet or YouTube Live — is enough. If you want more attendees, registration pages and reminder emails, choose a dedicated tool such as WebinarGeek (built-in GDPR), Zoom Webinars, WebinarJam or Demio. Look above all for screen sharing, interaction (chat, polls, Q&A), recording options and ease of use.
What does it cost to organize a webinar?
A webinar can be free with tools you already use. For a dedicated webinar tool, the starting price is usually between $25 and $90 a month, depending on your attendee numbers and features. For most beginning course creators, starting free and scaling up later is the smartest route.
How long should a webinar last?
Most webinars run between 30 and 60 minutes, including time for questions. Keep your topic specific enough to stay within that window: a tightly-focused webinar holds attention better than a broad ninety-minute talk. On mobile channels like Instagram Live, keep it shorter still.
Are you allowed to record a webinar?
Recording is allowed, but where privacy law like the GDPR applies you must inform participants in advance that you’re recording and what you’ll use the recording for. State it on your registration page, link to your privacy policy, and ask for consent where needed. If you want to share the recording publicly, say so up front and preferably keep only yourself and your slides on screen.
How do you turn a webinar into course sales?
Treat your webinar as the trailer and your course as the film. Share real value during the webinar, make a clear offer at the end, and send the recording afterwards with a link to your course. By putting the recording on your own platform, you sell it again and again. Our evergreen webinar funnel blueprint shows step by step how that works.
Ready to run your first webinar?
You’ve now got everything you need: a goal, a topic, a step-by-step plan, the right software, and a plan for the recording and follow-up. The last step is the best one — and the place your webinar earns its keep: turning that recording into a course you sell on your own platform.
That’s where Maatos comes in. You build your own course environment, drop your webinar recordings in as lessons, and sell them under your own brand — without the technical headache. Try Maatos free for 30 days and turn your first webinar into a course that keeps on selling. Prefer to talk it through first? Our team is happy to help you plan it out.